Tampilkan postingan dengan label Tips And Tricks. Tampilkan semua postingan

Rabu, 15 Januari 2014

secret android codes

Android & Nokia Some Secret Codes Revealed


This post is meant only for those who use a mobile phone, and here I am going to give you some secret codes useful for Android phones and Nokia, which are most common in the market today, you can use these secrets to learn more about your device and personalize your device, so share this post to all your friends who using a mobile phone.

Secret codes for android

Android Secret Codes:

For IMEI Number: *#06#  
For RAM Memory version: *#*#3264#*#*
For FTA SW version: *#*#1111#*#*
For FTA HW version: *#*#2222#*#*
For Touchscreen version: *#*#2663#*#*
View Phone Lock Status: *#7465625#
Executes Emergency Dial Screen to unlock PUK Code: **05**#
Enables Voice Dialing Logging Mode: *#*#8351#*#*
Disables Voice Dialing Logging Mode: *#*#8350#*#*
Change behavior of Power button: *#*#7594#*#*
To test Vibration and Back-light of device: *#*#0842#*#*
To test Proximity/Distance Sensor: *#*#0588#*#*
To test Touchscreen: *#*#2663#*#*
For Audio Test: *#*#0289#*#* or *#*#0673#*#*
To launch Service Mode: *#*#197328640#*#*
Hidden Service Menu (Motorola Droid): ##7764726
Field Test: *#*#7262626#*#*
To format the phone: *2767*3855#
To start GTalk Monitoring: *#*#8255#*#*
To get PDA, Phone, H/W and RF Call Date: *#*#4986*2650468#*#*
Displays Build Time and Change List number: *#*#44336#*#*
Packet Loopback Test: *#*#0283#*#*
LCD  Display Test: *#*#0*#*#*
Enter Service Menu (on New Phones): *#0*#
Diagnostic Configuration: *#9090#
USB Logging Control: *#872564#
System Dump Mode: *#9900#
To test Bluetooth: *#*#232331#*#*
To display Bluetooth Physic Address: #*#232337#*#
To test secret GPS: *#*#1472365#*#*
To test other GPS:  *#*#1575#*#*
To test WiFi/Wireless LAN of phone: *#*#232339#*#* or *#*#528#*#* or *#*#526#*#*
To display Wi-Fi MAC Address: *#*#232338#*#*
To Restore Factory Settings: *#*#7780#*#*
To create Immediate backup of your multimedia files: *#*#273282*255*663282*#*#*
To display Phone Information: *#*#4636#*#*
To get detailed Camera Information: *#*#34971539#*#*
For Software & Hardware Information: *#12580*369#
To display HSDPA/HSUPA Control Menu: *#301279#

nokia mobile secret codes

Nokia Secret Codes:

*#7780# :reset to factory settings.
*#67705646# :This will clear the LCD display (operator logo).
*#0000# :To view software version.
*#2820#: Blue tooth device address.
*#746025625# :Sim clock allowed status.
*#62209526# : Display the MAC address of the WLAN adapter. This is available only in the newer devices that support WLAN
#pw+1234567890+1#: Shows if sim have restrictions.
*#92702689# : takes you to a secret menu where you may find some of the information below:
1. Displays Serial Number.
2. Displays the Month and Year of Manufacture
3. Displays (if there) the date where the phone was purchased (MMYY)
4. Displays the date of the last repair – if found (0000)
5. Shows life timer of phone (time passes since last start)
*#7328748263373738# resets security code.  Default security code is 12345
Warranty Codes  * # 92702689 # [* # war0anty #]

Secret Mobile Phone Codes For Android And Nokia!

Share this with your friends those are using mobile phones.

Secret Mobile Phone Codes Revealed ( For Android & Nokia)

Jumat, 27 Desember 2013

Samsung Galaxy S4 (Verizon) SCH-I545 users who have already updated their devices with Android 4.3 Jelly Bean, may root their devices using the tutorial below.

This tutorial uses Root Exploit package released by Senior XDA-Developers, k1mu. The Root Exploit package allows Galaxy S4 users to root their devices easily without having to wipe the device or flash a full prerooted factory image. This method completely supports Android 4.3 Jelly Bean with base firmware VRUEMJ7 and VRUEMK2.

Note: This exploit will NOT set the Knox Warranty Void flag. It will set the "Custom" flag, but that's nothing to worry about.

Disclaimer: Rooting voids the warranty of your device. We and the developer of this rooting procedures shall not be held responsible if any undesirable outcomes may happen to your device. use of this root guide is solely at your own risk!

Pre-requisites
1. Install USB Drivers for Samsung Galaxy S4 on the computer.
2. Enable USB Debugging Mode on the phone. Go to Settings >> About Phone. Tap on Build Number several times till the message shows "You are now a Developer". Enable USB debugging by navigating to Settings >> Developer Options.
3. Make a backup of all your important data before following the guide.
4. Ensure the battery of the phone is charged more than 80 percent.
5. The Root Exploit package works only on the Verizon version of the Galaxy S4 (SCH-I545). Applying this to any incorrect variant might brick the device. Verify the model number of the Galaxy S4 by navigating to Settings >> About Phone.

File Required
1. Root Exploit (saferoot.zip) - Mirror Link

Steps to Root Galaxy S4 (Verizon) SCH-I545 Running on Android 4.3 Jelly Bean Firmware
Step 1: Extract the Root Exploit package to the computer using winrar/7zip/winzip or any other extracting tool.
Step 2: Connect the Galaxy S4 to the computer using USB cable.
Step 3: On the computer, navigate to the extracted directory and double click "install.bat" file. You will see command prompt window which will detect your device and automatically run the script.
Step 4: Once the rooting procedure completes, your phone will reboot automatically.

Samsung Galaxy S4 (Verizon) SCH-I545 running on Android 4.3 Jelly Bean firmware is now rooted successfully. You can now install any app that requires root permission. Verify the root status of the device by downloading Root Checker app from Google Play Store.

Note: Tested working on the Verizon Galaxy S4 (SCH-I545), AT&T Galaxy S4 (SGH-I337) and Verizon Galaxy S3 (SCH-I535). Try it and let us know.

Thank's to all fellas at XDA who first tried out this rooting technique. This method was originally posted via XDA-Developer original thread.

How to Root Galaxy S4 (Verizon) SCH-I545 on Android 4.3 Jelly Bean Firmware

Android Security Cookbook
Practical recipes to delve into Android's security mechanisms by troubleshooting common vulnerabilities in applications and Android OS versions
Overview
  • Analyze the security of Android applications and devices, and exploit common vulnerabilities in applications and Android operating systems
  • Develop custom vulnerability assessment tools using the Drozer Android Security Assessment Framework
  • Reverse-engineer Android applications for security vulnerabilities
  • Protect your Android application with up to date hardening techniques
In Detail
Android Security Cookbook discusses many common vulnerabilities and security related shortcomings in Android applications and operating systems. The book breaks down and enumerates the processes used to exploit and remediate these vulnerabilities in the form of detailed recipes and walkthroughs.
The book also teaches readers to use an Android Security Assessment Framework called Drozer and how to develop plugins to customize the framework.
Other topics covered include how to reverse-engineer Android applications to find common vulnerabilities, and how to find common memory corruption vulnerabilities on ARM devices. In terms of application protection this book will show various hardening techniques to protect application components, the data stored, secure networking. In summary, Android Security Cookbook provides a practical analysis into many areas of Android application and operating system security and gives the
What you will learn from this book
  • Set up the Android development tools and frameworks
  • Engage in Application security concepts
  • Use the Drozer Android Security Assessment Framework
  • Customize and develop your own plugins for the Drozer Framework
  • Exploit, enumerate, and analyze common application level exploits
  • Protect applications from common vulnerabilities and exploits
  • Reverse-engineer applications for common code level vulnerabilities
  • Secure application networking, SSL/TLS
  • Encryption to protect application data
Approach
"Android Security Cookbook' breaks down and enumerates the processes used to exploit and remediate Android app security vulnerabilities in the form of detailed recipes and walkthroughs.
Who this book is written for
"Android Security Cookbook" is aimed at anyone who is curious about Android app security and wants to be able to take the necessary practical measures to protect themselves; this means that Android application developers, security researchers and analysts, penetration testers, and generally any CIO, CTO, or IT managers facing the impeding onslaught of mobile devices in the business environment will benefit from reading this book.


Android Security Cookbook

Creating Dynamic UI with Android Fragments
Leverage the power of Android fragments to develop dynamic user interfaces for your apps
Overview
  • Learn everything you need to know to provide dynamic multi-screen UIs within a single activity
  • Integrate the rich UI features demanded by today’s mobile users
  • Understand the basics of using fragments and how to use them to create more adaptive and dynamic user experiences
In Detail
To create a dynamic and multi-pane user interface on Android, you need to encapsulate UI components and activity behaviors into modules that you can swap into and out of your activities. You can create these modules with the fragment class, which behaves somewhat like a nested activity that can define its own layout and manage its own lifecycle. When a fragment specifies its own layout, it can be configured in different combinations with other fragments inside an activity to modify your layout configuration for different screen sizes (a small screen might show one fragment at a time, but a large screen can show two or more).
Creating Dynamic UI with Android Fragments shows you how to create modern Android applications that meet the high expectations of today’s users. You will learn how to incorporate rich navigation features like swipe-based screen browsing and how to create adaptive UIs that ensure your application looks fantastic whether run on a low cost smartphone or the latest tablet.
This book looks at the impact fragments have on Android UI design and their role in both simplifying many common UI challenges and providing new ways to incorporate rich UI behaviors.
You will learn how to use fragments to create UIs that automatically adapt to device differences. We look closely at the roll of fragment transactions and how to work with the Android back stack. Leveraging this understanding, we then explore several specialized fragment-related classes like ListFragment and DialogFragment as well as rich navigation features like swipe-based screen browsing.
What you will learn from this book
  • Understand the role and capabilities of fragments
  • Explore the fragment-oriented features of Android Studio
  • Create an app UI that works effectively on smartphones and tablets
  • Use fragments to create engaging navigation capabilities like swipe-based screen browsing
  • Work with special purpose fragment classes like ListFragment and DialogFragment
  • Dynamically manage fragments using the FragmentTransaction class
  • Learn appropriate application design for communicating between fragments
  • Efficiently handle fragment creation and lifecycle
  • Simplify cross-thread UI handling with fragments
  • Form multi-screen UIs that run within a single activity
Approach
A fast-paced tutorial that guides you through everything you need to know about dynamic UI design for Android devices.
Who this book is written for
This book is for developers with a basic understanding of Android programming who would like to improve the appearance and usability of their applications. Whether you’re looking to create a more interactive user experience, create more dynamically adaptive UIs, provide better support for tablets and smartphones in a single app, reduce the complexity of managing your app UIs, or you are just trying to expand your UI design philosophy, then this book is for you.

Creating Dynamic UI with Android Fragments

Kamis, 26 Desember 2013

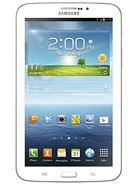
Samsung Galaxy Tab 3 7.0 with 3G connectivity (SM-T211) has already received another Android 4.1.2 Jelly Bean Over-The-Air (OTA) update with firmware build number T211XXAML1.

Firmware details
PDA: T211XXAML1
CSC: T211OXXAML2
MODEM: T211XXAML2
Version: Android 4.1.2
Build date: Dec 03, 2013
Regions: South East Europe

Samsung Galaxy Tab 3 7.0 SM-T211 users who missed the OTA update notification or unable to access the update over Samsung KIES, may follow our step-by-step guide to install the update manually.

Pre-requisites
1. Install USB Drivers for Samsung Galaxy Tab 3 7.0 on the computer.
2. Enable USB Debugging Mode on your tablet by navigating to Settings >> Developer Options.
3. Make a backup of all your important data before following the guide.
4. The Galaxy Tab 3 7.0 should be factory unlocked and not locked to any particular carrier.
5. Ensure the battery of the tablet is charged more than 80 percent.
6. The Android 4.1.2 XXAML1 Jelly Bean firmware is compatible only with the 3G version of the Samsung Galaxy Tab 3 7.0 (SM-T211). Applying this to any incorrect variant might brick the device. Verify the model number of the Galaxy Tab 3 7.0 by navigating to Settings >> About Phone.

Files Required
1. Android 4.1.2 XXAML1 Jelly Bean Firmware (Mirror Link) for Galaxy Tab 3 7.0 SM-T211
2. Odin 3.07

Steps to Update Galaxy Tab 3 7.0 SM-T211 with Android 4.1.2 XXAML1 Jelly Bean Firmware
Step 1: Extract Firmware zip file using winrar/7zip/winzip or any other extracting tool, you will get a .tar.md5 file and some other files (optional).
Step 2: Extract Odin zip file and you will get Odin3 v3.07.exe along with few other files.
Step 3: Switch off Galaxy Tab 3 7.0.
Step 4: Boot the device into Download Mode by pressing and holding Volume Down, Home and Power buttons together until a construction Android robot icon with a warning triangle appears on screen. Now press the Volume Up button to enter Download Mode.
Step 5: Run Odin on the computer as an Administrator.
Step 6: Connect the Galaxy Tab 3 7.0 to the computer using USB cable while it is in the Download Mode. Wait until Odin detects the device. When the device is connected successfully, the ID: COM box will turn to light blue with the COM port number. Additionally, the successful connected will be indicated by a message saying Added.

Note: If the Added message does not appear, then try re-install USB drivers or changing the port on the computer.

Step 7: Select the following files in Odin from extracted T211XXAML1 firmware folder:
  • Click the PDA button and select the .tar.md5 file.
  • Click the Phone button and select file with MODEM in its name. Ignore if there is no such file.
  • Click the CSC button and select file with CSC in its name. Ignore if there is no such file.
  • Click the PIT button and select the .pit file. Ignore if there is no such file.
Step 8: In Odin, enable Auto Reboot and F. Reset Time checkboxes. Also, ensure the Re-Partition checkbox is chosen only if a .pit file was chosen in the previous step.
Step 9: Verify everything suggested in Step 7 and Step 8 is done correctly. Then hit the Start button to begin the installation process.
Step 10: Once the installation process is completed, your device will restart and soon you will see a PASS message with green background in the left-most box at the very top of the Odin. You can now unplug the USB cable to disconnect your tablet from the computer.

Samsung Galaxy Tab 3 7.0 SM-T211 should be now updated with the Android 4.1.2 XXAML1 Jelly Bean official firmware. Head over to Settings >> About Phone to verify the software version running on the device.

Note: If Galaxy Tab 3 7.0 SM-T211 stuck at booting animation after Step 10 then go to recovery mode (press and hold the Volume Up, Home and Power buttons together) and perform Wipe data/Factory Reset and Wipe Cache Partition task before selecting reboot system now function. In recovery mode use Volume keys to navigate between options and Power key to select the option. Please note, performing wiping task will erase your device internal memory data and not external SD card data.

Click here to know How to Root Galaxy Tab 3 7.0 SM-T211 running on Android 4.1.2 Jelly Bean firmware.

How to Update Galaxy Tab 3 7.0 SM-T211 with Android 4.1.2 XXAML1 Jelly Bean Official Firmware

Samsung Galaxy S3 (GT-I9300) users in Switzerland has just received the latest Android 4.3 Jelly Bean update with firmware build number I9300XXUGML2. The new official firmware is now available as an Over-The-Air (OTA) update as well as through Samsung KIES.

Firmware details
PDA: I9300XXUGML2
CSC: I9300AUTGML1
MODEM: I9300XXUGMK6
Version: Android 4.3
Build date: Dec 13, 2013
Regions: Switzerland

Samsung Galaxy S3 I9300 users who missed the OTA update notification or unable to access the update over Samsung KIES, and those who are residing outside the supported regions can now download and install the same manually, using our step-by-step guide.

Pre-requisites
1. Install USB Drivers for Samsung Galaxy S3 on the computer.
2. Enable USB Debugging Mode on the phone by navigating to Settings >> Developer Options.
3. Make a backup of all your important data before following the guide.
4. The Galaxy S3 should be factory unlocked and not locked to any particular carrier.
5. Ensure the battery of the phone is charged more than 80 percent.
6. The Android 4.3 XXUGML2 Jelly Bean firmware is compatible only with the international version of Samsung Galaxy S3 (GT-I9300). Applying this to any incorrect variant might brick the device. Verify the model number of the Galaxy S3 by navigating to Settings >> About Phone.

Files Required
1. Android 4.3 XXUGML2 Jelly Bean Firmware (Mirror Link) for Galaxy S3 I9300
2. Odin 3.07

Steps to Update Galaxy S3 I9300 with Android 4.3 XXUGML2 Jelly Bean Firmware
Step 1: Extract Firmware zip file using winrar/7zip/winzip or any other extracting tool, you will get a .tar.md5 file and some other files.
Step 2: Extract Odin zip file and you will get Odin3 v3.07.exe along with few other files.
Step 3: Switch off the Galaxy S3.
Step 4: Boot the device into Download Mode by pressing and holding Volume Down, Home and Power buttons together until a construction Android robot icon with a warning triangle appears on screen. Now press the Volume Up button to enter Download Mode.
Step 5: Run Odin on the computer as an Administrator.
Step 6: Connect the Galaxy S3 to the computer using USB cable while it is in the Download Mode. Wait until Odin detects the device. When the device is connected successfully, the ID: COM box will turn to light blue with the COM port number. Additionally, the successful connected will be indicated by a message saying Added.

Note: If the Added message does not appear, then try re-install USB drivers or changing the port on the computer.

Step 7: Select the following files in Odin from extracted I9300XXUGML2 firmware folder:
  • Click the PDA button and select the .tar.md5 file.
  • Click the Phone button and select file with MODEM in its name. Ignore if there is no such file.
  • Click the CSC button and select file with CSC in its name. Ignore if there is no such file.
  • Click the PIT button and select the .pit file. Ignore if there is no such file.
    Step 8: In Odin, enable Auto Reboot and F. Reset Time checkboxes. Also, ensure the Re-Partition checkbox is chosen only if a .pit file was chosen in the previous step.
    Step 9: Verify everything suggested in Step 7 and Step 8 is done correctly. Then hit the Start button to begin the installation process.
    Step 10: Once the installation process is completed, your phone will restart and soon you will see a PASS message with green background in the left-most box at the very top of the Odin. You can now unplug the USB cable to disconnect your device from the computer.

    Samsung Galaxy S3 I9300 should be now updated with official Android 4.3 XXUGML2 Jelly Bean. Head over to Settings >> About Phone to verify the software version running on the device.

    Note: If Galaxy S3 I9300 stuck at booting animation after Step 10 then go to recovery mode (press and hold the Volume Up, Home and Power buttons together) and perform Wipe data/Factory Reset and Wipe Cache Partition task before selecting reboot system now function. In recovery mode use Volume keys to navigate between options and Power key to select the option. Please note, performing wiping task will erase your device internal memory data and not external SD card data.

    Click here to know How to Root Galaxy S3 I9300 running on Android 4.3 Jelly Bean firmware.

    How to Update Galaxy S3 I9300 with Android 4.3 XXUGML2 Jelly Bean Official Firmware

    Samsung has rolled out another Android 4.1.2 Jelly Bean update with firmware build number N8000XXCMI2 for the Brazilian owners of the Galaxy Note 10.1 (GT-N8000). The new official update is currently available as an Over-The-Air (OTA) update as well as through Samsung KIES.

    Firmware details
    PDA: N8000UBCML2
    CSC: N8000ZTOCML3
    MODEM: N8000UBLL2
    Version: Android 4.1.2
    Build date: Dec 16, 2013
    Regions: Brazil

    Samsung Galaxy Note 10.1 N8000 users who missed the OTA update notification or unable to access the update over Samsung KIES, may follow our step-by-step guide to install the update manually.

    Pre-requisites
    1. Install USB Drivers for Samsung Galaxy Note 10.1 on the computer.
    2. Enable USB Debugging Mode on the phone by navigating to Settings >> Developer Options.
    3. Make a backup of all your important data before following the guide.
    4. The Galaxy Note 10.1 should be factory unlocked and not locked to any particular carrier.
    5. Ensure the battery of the phone is charged more than 80 percent.
    6. The Android 4.1.2 UBCML2 Jelly Bean firmware is compatible only with the 3G + WiFi version of Samsung Galaxy Note 10.1 with model number GT-N8000. Applying this to any incorrect variant might brick the device. Verify the model number of the Galaxy Note 10.1 by navigating to Settings >> About Phone.

    Files Required
    1. Android 4.1.2 UBCML2 Jelly Bean Firmware (Mirror Link) for Galaxy Note 10.1 N8000
    2. Odin 3.07

    Steps to Update Galaxy Note 10.1 N8000 with Android 4.1.2 UBCML2 Jelly Bean Firmware
    Step 1: Extract Firmware zip file using winrar/7zip/winzip or any other extracting tool, you will get a .tar.md5 file and some other files (optional).
    Step 2: Extract Odin zip file and you will get Odin3 v3.07.exe along with few other files.
    Step 3: Switch off the Galaxy Note 10.1.
    Step 4: Boot the device into Download Mode by pressing and holding Volume Down and Power buttons together until a construction Android robot icon with a warning triangle appears on screen. Now press the Volume Up button to enter Download Mode.
    Step 5: Run Odin on the computer as an Administrator.
    Step 6: Connect the Galaxy Note 10.1 to the computer using USB cable while it is in the Download Mode. Wait until Odin detects the device. When the device is connected successfully, the ID: COM box will turn to light blue with the COM port number. Additionally, the successful connected will be indicated by a message saying Added.

    Note: If the Added message does not appear, then try re-install USB drivers or changing the port on the computer.

    Step 7: Select the following files in Odin from extracted N8000UBCML2 firmware folder:
    • Click the PDA button and select the .tar.md5 file.
    • Click the Phone button and select file with MODEM in its name. Ignore if there is no such file.
    • Click the CSC button and select file with CSC in its name. Ignore if there is no such file.
    • Click the PIT button and select the .pit file. Ignore if there is no such file.
      Step 8: In Odin, enable Auto Reboot and F. Reset Time checkboxes. Also, ensure the Re-Partition checkbox is chosen only if a .pit file was chosen in the previous step.
      Step 9: Verify everything suggested in Step 7 and Step 8 is done correctly. Then hit the Start button to begin the installation process.
      Step 10: Once the installation process is completed, your phone will restart and soon you will see a PASS message with green background in the left-most box at the very top of the Odin. You can now unplug the USB cable to disconnect it from the computer.

      Samsung Galaxy Note 10.1 N8000 should be now updated with official Android 4.1.2 UBCML2 Jelly Bean. Head over to Settings >> About Phone to verify the software version running on the device.

      Note: If Galaxy Note 10.1 N8000 stuck at booting animation after Step 10 then go to recovery mode (press and hold the Volume Up and Power buttons together) and perform Wipe data/Factory Reset and Wipe Cache Partition task before selecting reboot system now function. In recovery mode use Volume keys to navigate between options and Power key to select the option. Please note, performing wiping task will erase your device internal memory data and not external SD card data.

      Click here to know How to Root Galaxy Note 10.1 N8000 running on Android 4.1.2 Jelly Bean firmware.

      How to Update Galaxy Note 10.1 N8000 with Android 4.1.2 UBCML2 Jelly Bean Official Firmware

      The Wi-Fi version of the Samsung Galaxy Tab 2 10.1 with model number GT-P5110 has received the latest Android 4.2.2 Jelly Bean update with firmware build number P5110XXDML1. The new official update is currently available as an Over-The-Air (OTA) update as well as through Samsung KIES.

      Firmware details
      PDA: P5110XXDML1
      CSC: P5110PHNDMJ1
      MODEM: P5110XXDML1
      Version: Android 4.2.2
      Build date: Dec 16, 2013
      Regions: Netherlands

      Samsung Galaxy Tab 2 10.1 (Wi-Fi) P5110 users who missed the OTA update notification or unable to access the update over Samsung KIES, and those who are residing outside Netherlands can now download and install the same manually, using our step-by-step guide.

      Pre-requisites
      1. Install USB Drivers for Samsung Galaxy Tab 2 10.1 on the computer.
      2. Enable USB Debugging Mode on the device by navigating to Settings >> Developer Options.
      3. Make a backup of all your important data before following the guide.
      4. The Galaxy Tab 2 10.1 should be factory unlocked.
      5. Ensure the battery of the device is charged more than 80 percent.
      6. The Android 4.2.2 XXDML1 Jelly Bean firmware is compatible only with the Wi-Fi version of Samsung Galaxy Tab 2 10.1 with model number P5110. Applying this to any incorrect variant might brick the device. Verify the model number of the Galaxy Tab 2 10.1 by navigating to Settings >> About Phone.

      Files Required
      1. Android 4.2.2 XXDML1 Jelly Bean Firmware (Mirror Link) for Galaxy Tab 2 10.1 (Wi-Fi) P5110
      2. Odin 3.07

      Steps to Update Galaxy Tab 2 10.1 (Wi-Fi) P5110 with Android 4.2.2 XXDML1 Jelly Bean Firmware
      Step 1: Extract Firmware zip file using winrar/7zip/winzip or any other extracting tool, you will get a .tar.md5 file and some other files (optional).
      Step 2: Extract Odin zip file and you will get Odin3 v3.07.exe along with few other files.
      Step 3: Switch off Galaxy Tab 2 10.1.
      Step 4: Boot the device into Download Mode by pressing and holding Volume Down and Power buttons together until a construction Android robot icon with a warning triangle appears on screen. Now press the Volume Up button to enter Download Mode.
      Step 5: Run Odin on the computer as an Administrator.
      Step 6: Connect the Galaxy Tab 2 10.1 to the computer using USB cable while it is in the Download Mode. Wait until Odin detects the device. When the device is connected successfully, the ID: COM box will turn to light blue with the COM port number. Additionally, the successful connected will be indicated by a message saying Added.

      Note: If the Added message does not appear, then try re-install USB drivers or changing the port on the computer.

      Step 7: Select the following files in Odin from extracted P5110XXDML1 firmware folder:
      • Click the PDA button and select the .tar.md5 file.
      • Click the Phone button and select file with MODEM in its name. Ignore if there is no such file.
      • Click the CSC button and select file with CSC in its name. Ignore if there is no such file.
      • Click the PIT button and select the .pit file. Ignore if there is no such file.
        Step 8: In Odin, enable Auto Reboot and F. Reset Time checkboxes. Also, ensure the Re-Partition checkbox is chosen only if a .pit file was chosen in the previous step.
        Step 9: Verify everything suggested in Step 7 and Step 8 is done correctly. Then hit the Start button to begin the installation process.
        Step 10: Once the installation process is completed, your device will restart and soon you will see a PASS message with green background in the left-most box at the very top of the Odin. You can now unplug the USB cable to disconnect your device from the computer.

        Samsung Galaxy Tab 2 10.1 (Wi-Fi) P5110 should be now updated with official Android 4.2.2 XXDML1 Jelly Bean. Head over to Settings >> About Phone to verify the software version running on the device.

        Note: If Galaxy Tab 2 10.1 (Wi-Fi) P5110 stuck at booting animation after Step 10 then go to recovery mode (press and hold the Volume Up and Power buttons together) and perform Wipe data/Factory Reset and Wipe Cache Partition task before selecting reboot system now function. In recovery mode use Volume keys to navigate between options and Power key to select the option. Please note, performing wiping task will erase your device internal memory data and not external SD card data.

        Click here to know How to Root Galaxy Tab 2 10.1 (Wi-Fi) P5110 running on Android 4.2.2 Jelly Bean firmware.

        How to Update Galaxy Tab 2 10.1 (Wi-Fi) P5110 with Android 4.2.2 XXDML1 Jelly Bean Official Firmware

        Samsung has released the latest Android 4.3 Jelly Bean update with firmware build number N7100DDUEML4 for Galaxy Note 2 (GT-N7100) users in India, Nepal, Sri Lanka, and Bangladesh. The new official firmware is now available as an Over-The-Air (OTA) update as well as through Samsung KIES.

        Firmware details
        PDA: N7100DDUEML4
        CSC: N7100ODDEML2
        MODEM: N7100DDEMK1
        Version: Android 4.3
        Build date: Dec 18, 2013
        Regions: India, Nepal, Sri Lanka, Bangladesh

        Samsung Galaxy Note 2 N7100 users who missed the OTA update notification or unable to access the update over Samsung KIES, may follow our step-by-step guide to install the update manually.

        Pre-requisites
        1. Install USB Drivers for Samsung Galaxy Note 2 on the computer.
        2. Enable USB Debugging Mode on the phone by navigating to Settings >> Developer Options.
        3. Make a backup of all your important data before following the guide.
        4. The Galaxy Note 2 should be factory unlocked and not locked to any particular carrier.
        5. Ensure the battery of the phone is charged more than 80 percent.
        6. The Android 4.3 DDUEML4 Jelly Bean firmware is compatible only with the Samsung Galaxy Note 2 with model number GT-N7100. Applying this to any incorrect variant might brick the device. Verify the model number of the Galaxy Note 2 by navigating to Settings >> About Phone.

        Files Required
        1. Android 4.3 DDUEML4 Jelly Bean Firmware (Mirror Link) for Galaxy Note 2 N7100
        2. Odin 3.07

        Steps to Update Galaxy Note 2 N7100 with Android 4.3 DDUEML4 Jelly Bean Firmware
        Step 1: Extract Firmware zip file using winrar/7zip/winzip or any other extracting tool, you will get a .tar.md5 file and some other files (optional).
        Step 2: Extract Odin zip file and you will get Odin3 v3.07.exe along with few other files.
        Step 3: Switch off the Galaxy Note 2.
        Step 4: Boot the device into Download Mode by pressing and holding Volume Down and Power buttons together until a construction Android robot icon with a warning triangle appears on screen. Now press the Volume Up button to enter Download Mode.
        Step 5: Run Odin on the computer as an Administrator.
        Step 6: Connect the Galaxy Note 2 to the computer using USB cable while it is in the Download Mode. Wait until Odin detects the device. When the device is connected successfully, the ID: COM box will turn to light blue with the COM port number. Additionally, the successful connected will be indicated by a message saying Added.

        Note: If the Added message does not appear, then try re-install USB drivers or changing the port on the computer.

        Step 7: Select the following files in Odin from extracted N7100DDUEML4 firmware folder:
        • Click the PDA button and select the .tar.md5 file.
        • Click the Phone button and select file with MODEM in its name. Ignore if there is no such file.
        • Click the CSC button and select file with CSC in its name. Ignore if there is no such file.
        • Click the PIT button and select the .pit file. Ignore if there is no such file.
          Step 8: In Odin, enable Auto Reboot and F. Reset Time checkboxes. Also, ensure the Re-Partition checkbox is chosen only if a .pit file was chosen in the previous step.
          Step 9: Verify everything suggested in Step 7 and Step 8 is done correctly. Then hit the Start button to begin the installation process.
          Step 10: Once the installation process is completed, your phone will restart and soon you will see a PASS message with green background in the left-most box at the very top of the Odin. You can now unplug the USB cable to disconnect it from the computer.

          Samsung Galaxy Note 2 N7100 should be now updated with official Android 4.3 DDUEML4 Jelly Bean. Head over to Settings >> About Phone to verify the software version running on the device.

          Note: If Galaxy Note 2 N7100 stuck at booting animation after Step 10 then go to recovery mode (press and hold the Volume Up and Power buttons together) and perform Wipe data/Factory Reset and Wipe Cache Partition task before selecting reboot system now function. In recovery mode use Volume keys to navigate between options and Power key to select the option. Please note, performing wiping task will erase your device internal memory data and not external SD card data.

          Click here to know How to Root Galaxy Note 2 N7100 running on Android 4.3 Jelly Bean firmware.

          How to Update Galaxy Note 2 N7100 with Android 4.3 DDUEML4 Jelly Bean Official Firmware

          The Exynos 5 octa-core variant of Samsung Galaxy S4 (GT-I9500) has already received the latest Android 4.3 Jelly Bean update with firmware build number I9500XXUEMK9. The new official firmware is now available as an Over-The-Air (OTA) update as well as through Samsung KIES.

          Firmware details
          PDA: I9500XXUEMK9
          CSC: I9500ODDEMK9
          MODEM: I9500DDUEMK9
          Version: Android 4.3
          Build date: Nov 29, 2013
          Regions: India, Nepal, Sri Lanka, Bangladesh

          Samsung Galaxy S4 I9500 users who missed the OTA update notification or unable to access the update over Samsung KIES, may follow our step-by-step guide to install the update manually.

          Pre-requisites
          1. Install USB Drivers for Samsung Galaxy S4 on the computer.
          2. Enable USB Debugging Mode on the phone by navigating to Settings >> Developer Options.
          3. Make a backup of all your important data before following the guide.
          4. The Galaxy S4 should be factory unlocked and not locked to any particular carrier.
          5. Ensure the battery of the phone is charged more than 80 percent.
          6. The Android 4.3 XXUEMK9 Jelly Bean firmware is compatible only with the Galaxy S4 with model number GT-I9500. Applying this to any incorrect variant might brick the device. Verify the model number of the Galaxy S4 by navigating to Settings >> About Phone.

          Files Required
          1. Android 4.3 XXUEMK9 Jelly Bean Firmware (Mirror Link) for Galaxy S4 I9500
          2. Odin 3.07

          Steps to Update Galaxy S4 I9500 with Android 4.3 XXUEMK9 Jelly Bean Firmware
          Step 1: Extract Firmware zip file using winrar/7zip/winzip or any other extracting tool, you will get a .tar.md5 file and some other files (optional).
          Step 2: Extract Odin zip file and you will get Odin3 v3.07.exe along with few other files.
          Step 3: Switch off the Galaxy S4.
          Step 4: Boot the device into Download Mode by pressing and holding Volume Down, Home and Power buttons together until a construction Android robot icon with a warning triangle appears on screen. Now press the Volume Up button to enter Download Mode.
          Step 5: Run Odin on the computer as an Administrator.
          Step 6: Connect the Galaxy S4 to the computer using USB cable while it is in the Download Mode. Wait until Odin detects the device. When the device is connected successfully, the ID: COM box will turn to light blue with the COM port number. Additionally, the successful connected will be indicated by a message saying Added.

          Note: If the Added message does not appear, then try re-install USB drivers or changing the port on the computer.

          Step 7: Select the following files in Odin from extracted I9500XXUEMK9 firmware folder:
          • Click the PDA button and select the .tar.md5 file.
          • Click the Phone button and select file with MODEM in its name. Ignore if there is no such file.
          • Click the CSC button and select file with CSC in its name. Ignore if there is no such file.
          • Click the PIT button and select the .pit file. Ignore if there is no such file.
            Step 8: In Odin, enable Auto Reboot and F. Reset Time checkboxes. Also, ensure the Re-Partition checkbox is chosen only if a .pit file was chosen in the previous step.
            Step 9: Verify everything suggested in Step 7 and Step 8 is done correctly. Then hit the Start button to begin the installation process.
            Step 10: Once the installation process is completed, your phone will restart and soon you will see a PASS message with green background in the left-most box at the very top of the Odin. You can now unplug the USB cable to disconnect it from the computer.

            Samsung Galaxy S4 I9500 should be now updated with official Android 4.3 XXUEMK9 Jelly Bean. Head over to Settings >> About Phone to verify the software version running on the device.

            Note: If Galaxy S4 I9500 stuck at booting animation after Step 10 then go to recovery mode (press and hold the Volume Up, Home and Power buttons together) and perform Wipe data/Factory Reset and Wipe Cache Partition task before selecting reboot system now function. In recovery mode use Volume keys to navigate between options and Power key to select the option. Please note, performing wiping task will erase your device internal memory data and not external SD card data.

            Click here to know How to Root Galaxy S4 I9500 running on Android 4.3 Jelly Bean firmware.

            How to Update Galaxy S4 I9500 with Android 4.3 XXUEMK9 Jelly Bean Official Firmware

            Samsung has recently released another Android 4.2.2 Jelly Bean update with firmware build number N5110XXCMK1 for the Wi-Fi variant of the Galaxy Note 8.0 (GT-N5110). The new official firmware is now available as an Over-The-Air (OTA) update as well as through Samsung KIES.

            Firmware details
            PDA: N5110XXCMK1
            CSC: N5110OXACMJ2
            MODEM: N5110XXCMK1
            Version: Android 4.2.2
            Build date: Nov 01, 2013
            Regions: United Kingdom

            Samsung Galaxy Note 8.0 (Wi-Fi) N5110 users who missed the OTA update notification or unable to access the update over Samsung KIES, and those who are residing outside UK can now download and install the same manually, using our step-by-step guide.

            Pre-requisites
            1. Install USB Drivers for Samsung Galaxy Note 8.0 on the computer.
            2. Enable USB Debugging Mode on the phone by navigating to Settings >> Developer Options.
            3. Make a backup of all your important data before following the guide.
            4. The Galaxy Note 8.0 should be factory unlocked.
            5. Ensure the battery of the phone is charged more than 80 percent.
            6. The Android 4.2.2 XXCMK1 Jelly Bean firmware is compatible only with the Wi-Fi version of the Galaxy Note 8.0 (GT-N5110). Applying this to any incorrect variant might brick the device. Verify the model number of the Galaxy Note 8.0 by navigating to Settings >> About Phone.

            Files Required
            1. Android 4.2.2 XXCMK1 Jelly Bean Firmware (Mirror Link) for Galaxy Note 8.0 (Wi-Fi) N5110
            2. Odin 3.07

            Steps to Update Galaxy Note 8.0 (Wi-Fi) N5110 with Android 4.2.2 XXCMK1 Jelly Bean Firmware
            Step 1: Extract Firmware zip file using winrar/7zip/winzip or any other extracting tool, you will get a .tar.md5 file and some other files (optional).
            Step 2: Extract Odin zip file and you will get Odin3 v3.07.exe along with few other files.
            Step 3: Switch off the Galaxy Note 8.0.
            Step 4: Boot the device into Download Mode by pressing and holding Volume Down, Home and Power buttons together until a construction Android robot icon with a warning triangle appears on screen. Now press the Volume Up button to enter Download Mode.
            Step 5: Run Odin on the computer as an Administrator.
            Step 6: Connect the Galaxy Note 8.0 to the computer using USB cable while it is in the Download Mode. Wait until Odin detects the device. When the device is connected successfully, the ID: COM box will turn to light blue with the COM port number. Additionally, the successful connected will be indicated by a message saying Added.

            Note: If the Added message does not appear, then try re-install USB drivers or changing the port on the computer.

            Step 7: Select the following files in Odin from extracted N5110XXCMK1 firmware folder:
            • Click the PDA button and select the .tar.md5 file.
            • Click the Phone button and select file with MODEM in its name. Ignore if there is no such file.
            • Click the CSC button and select file with CSC in its name. Ignore if there is no such file.
            • Click the PIT button and select the .pit file. Ignore if there is no such file.
              Step 8: In Odin, enable Auto Reboot and F. Reset Time checkboxes. Also, ensure the Re-Partition checkbox is chosen only if a .pit file was chosen in the previous step.
              Step 9: Verify everything suggested in Step 7 and Step 8 is done correctly. Then hit the Start button to begin the installation process.
              Step 10: Once the installation process is completed, your phone will restart and soon you will see a PASS message with green background in the left-most box at the very top of the Odin. You can now unplug the USB cable to disconnect your device from the computer.

              Samsung Galaxy Note 8.0 (Wi-Fi) N5110 should be now updated with official Android 4.2.2 XXCMK1 Jelly Bean. Head over to Settings >> About Phone to verify the software version running on the device.

              Note: If Galaxy Note 8.0 (Wi-Fi) N5110 stuck at booting animation after Step 10 then go to recovery mode (press and hold the Volume Up, Home and Power buttons together) and perform Wipe data/Factory Reset and Wipe Cache Partition task before selecting reboot system now function. In recovery mode use Volume keys to navigate between options and Power key to select the option. Please note, performing wiping task will erase your device internal memory data and not external SD card data.

              Click here to know How to Root Galaxy Note 8.0 (Wi-Fi) N5110 running on Android 4.2.2 Jelly Bean firmware.

              How to Update Galaxy Note 8.0 (Wi-Fi) N5110 with Android 4.2.2 XXCMK1 Jelly Bean Official Firmware

              Selasa, 24 Desember 2013

              Learning Mobile App Development: A Hands-on Guide to Building Apps with iOS and Android
              - The Only Tutorial Covering BOTH iOS and Android—for students and professionals alike!


              Now, one book can help you master mobile app development with both market-leading platforms: Apple’s iOS and Google’s Android. Perfect for both students and professionals, Learning Mobile App Development is the only tutorial with complete parallel coverage of both iOS and Android. With this guide, you can master either platform, or both—and gain a deeper understanding of the issues associated with developing mobile apps.

              You’ll develop an actual working app on both iOS and Android, mastering the entire mobile app development lifecycle, from planning through licensing and distribution.
              Each tutorial in this book has been carefully designed to support readers with widely varying backgrounds and has been extensively tested in live developer training courses. If you’re new to iOS, you’ll also find an easy, practical introduction to Objective-C, Apple’s native language.

              All source code for this book, organized by chapter, is available at https://github.com/LearningMobile/BookApps

              Coverage includes
              • Understanding the unique design challenges associated with mobile apps
              • Setting up your Android and iOS development environments
              • Mastering Eclipse development tools for Android and Xcode 5 tools for iOS
              • Designing interfaces and navigation schemes that leverage each platform’s power
              • Reliably integrating persistent data into your apps
              • Using lists (Android) or tables (iOS) to effectively present data to users
              • Capturing device location, displaying it, and using it in your apps
              • Accessing hardware devices and sensors
              • Publishing custom apps internally within an organization
              • Monetizing your apps on Apple’s AppStore or the Google Play marketplace, as well as other ways of profiting from app development, such as consulting and developer jobs

              Learning Mobile App Development: A Hands-on Guide to Building Apps with iOS and Android

              Minggu, 22 Desember 2013

              Samsung recently released the Android 4.3 Jelly Bean update with firmware build number N7100XXUEMKA for the international version of the Galaxy Note 2 (GT-N7100). The new official firmware is now available as an Over-The-Air (OTA) update as well as through Samsung KIES.

              Firmware details
              PDA: N7100XXUEMKA
              CSC: N7100OJVEMK3
              MODEM: N7100XXUEMJ9
              Version: Android 4.3
              Build date: Nov 21, 2013
              Regions: South Africa, Morocco, Afghanistan, United Arab Emirates, Saudi Arabia, Nigeria, Egypt, Kenya, Iraq, Tunisia, Libya, Pakistan

              The Android 4.3 Jelly Bean update brings a host of new features and improvements over its previous firmware, like faster performance, Galaxy Gear compatibility, newer versions of Multi-Window from the Note 3, Group Play, Easy Mode, new camera modes and firmware, an upgraded interface, KNOX functionality, and more.

              Samsung Galaxy Note 2 N7100 users who missed the OTA update notification or unable to access the update over Samsung KIES, may follow our step-by-step guide to install the update manually.

              Pre-requisites
              1. Install USB Drivers for Samsung Galaxy Note 2 on the computer.
              2. Enable USB Debugging Mode on the phone by navigating to Settings >> Developer Options.
              3. Make a backup of all your important data before following the guide.
              4. The Galaxy Note 2 should be factory unlocked and not locked to any particular carrier.
              5. Ensure the battery of the phone is charged more than 80 percent.
              6. The Android 4.3 XXUEMKA Jelly Bean firmware is compatible only with the Samsung Galaxy Note 2 with model number GT-N7100. Applying this to any incorrect variant might brick the device. Verify the model number of the Galaxy Note 2 by navigating to Settings >> About Phone.

              Files Required
              1. Android 4.3 XXUEMKA Jelly Bean Firmware (Mirror Link) for Galaxy Note 2 N7100
              2. Odin 3.07

              Steps to Update Galaxy Note 2 N7100 with Android 4.3 XXUEMKA Jelly Bean Firmware
              Step 1: Extract Firmware zip file using winrar/7zip/winzip or any other extracting tool, you will get a .tar.md5 file and some other files (optional).
              Step 2: Extract Odin zip file and you will get Odin3 v3.07.exe along with few other files.
              Step 3: Switch off the Galaxy Note 2.
              Step 4: Boot the device into Download Mode by pressing and holding Volume Down and Power buttons together until a construction Android robot icon with a warning triangle appears on screen. Now press the Volume Up button to enter Download Mode.
              Step 5: Run Odin on the computer as an Administrator.
              Step 6: Connect the Galaxy Note 2 to the computer using USB cable while it is in the Download Mode. Wait until Odin detects the device. When the device is connected successfully, the ID: COM box will turn to light blue with the COM port number. Additionally, the successful connected will be indicated by a message saying Added.

              Note: If the Added message does not appear, then try re-install USB drivers or changing the port on the computer.

              Step 7: Select the following files in Odin from extracted N7100XXUEMKA firmware folder:
              • Click the PDA button and select the .tar.md5 file.
              • Click the Phone button and select file with MODEM in its name. Ignore if there is no such file.
              • Click the CSC button and select file with CSC in its name. Ignore if there is no such file.
              • Click the PIT button and select the .pit file. Ignore if there is no such file.
                Step 8: In Odin, enable Auto Reboot and F. Reset Time checkboxes. Also, ensure the Re-Partition checkbox is chosen only if a .pit file was chosen in the previous step.
                Step 9: Verify everything suggested in Step 7 and Step 8 is done correctly. Then hit the Start button to begin the installation process.
                Step 10: Once the installation process is completed, your phone will restart and soon you will see a PASS message with green background in the left-most box at the very top of the Odin. You can now unplug the USB cable to disconnect it from the computer.

                Samsung Galaxy Note 2 N7100 should be now updated with official Android 4.3 XXUEMKA Jelly Bean. Head over to Settings >> About Phone to verify the software version running on the device.

                Note: If Galaxy Note 2 N7100 stuck at booting animation after Step 10 then go to recovery mode (press and hold the Volume Up and Power buttons together) and perform Wipe data/Factory Reset and Wipe Cache Partition task before selecting reboot system now function. In recovery mode use Volume keys to navigate between options and Power key to select the option. Please note, performing wiping task will erase your device internal memory data and not external SD card data.

                Click here to know How to Root Galaxy Note 2 N7100 running on Android 4.3 Jelly Bean firmware.

                How to Update Galaxy Note 2 N7100 with Android 4.3 XXUEMKA Jelly Bean Official Firmware

                There is a post "Java exercise - Implement client and server to communicate using Socket" in my another blog, Hello Raspberry Pi. In which, both host (implement ServerSocket and Socket) and client (implement Socket) are run on Raspberry Pi to setup communication between application via socket. Actually both the host and client can run on any PC with Java.

                The client side in the post is ported to Android in this exercise, setup Socket in AsyncTask, to communicate with Raspberry Pi. The updated version of Host (run socket operation in background thread) run on Raspberry Pi or any other PC is here.

                Implement Socket on Android to communicate with Raspberry Pi
                Implement Socket on Android
                MainActivity.java
                package com.example.androidclient;

                import java.io.ByteArrayOutputStream;
                import java.io.IOException;
                import java.io.InputStream;
                import java.net.Socket;
                import java.net.UnknownHostException;

                import android.os.AsyncTask;
                import android.os.Bundle;
                import android.app.Activity;
                import android.view.View;
                import android.view.View.OnClickListener;
                import android.widget.Button;
                import android.widget.EditText;
                import android.widget.TextView;

                public class MainActivity extends Activity {

                TextView textResponse;
                EditText editTextAddress, editTextPort;
                Button buttonConnect, buttonClear;

                @Override
                protected void onCreate(Bundle savedInstanceState) {
                super.onCreate(savedInstanceState);
                setContentView(R.layout.activity_main);

                editTextAddress = (EditText)findViewById(R.id.address);
                editTextPort = (EditText)findViewById(R.id.port);
                buttonConnect = (Button)findViewById(R.id.connect);
                buttonClear = (Button)findViewById(R.id.clear);
                textResponse = (TextView)findViewById(R.id.response);

                buttonConnect.setOnClickListener(buttonConnectOnClickListener);

                buttonClear.setOnClickListener(new OnClickListener(){

                @Override
                public void onClick(View v) {
                textResponse.setText("");
                }});
                }

                OnClickListener buttonConnectOnClickListener =
                new OnClickListener(){

                @Override
                public void onClick(View arg0) {
                /*
                * You have to verify editTextAddress and
                * editTextPort are input as correct format.
                */

                MyClientTask myClientTask = new MyClientTask(
                editTextAddress.getText().toString(),
                Integer.parseInt(editTextPort.getText().toString()));
                myClientTask.execute();
                }};

                public class MyClientTask extends AsyncTask<Void, Void, Void> {

                String dstAddress;
                int dstPort;
                String response;

                MyClientTask(String addr, int port){
                dstAddress = addr;
                dstPort = port;
                }

                @Override
                protected Void doInBackground(Void... arg0) {

                try {
                Socket socket = new Socket(dstAddress, dstPort);
                InputStream inputStream = socket.getInputStream();
                ByteArrayOutputStream byteArrayOutputStream =
                new ByteArrayOutputStream(1024);
                byte[] buffer = new byte[1024];

                int bytesRead;
                while ((bytesRead = inputStream.read(buffer)) != -1){
                byteArrayOutputStream.write(buffer, 0, bytesRead);
                }

                socket.close();
                response = byteArrayOutputStream.toString("UTF-8");

                } catch (UnknownHostException e) {
                // TODO Auto-generated catch block
                e.printStackTrace();
                } catch (IOException e) {
                // TODO Auto-generated catch block
                e.printStackTrace();
                }
                return null;
                }

                @Override
                protected void onPostExecute(Void result) {
                textResponse.setText(response);
                super.onPostExecute(result);
                }

                }

                }


                Layout
                <LinearLayout xmlns:android="http://schemas.android.com/apk/res/android"
                xmlns:tools="http://schemas.android.com/tools"
                android:layout_width="match_parent"
                android:layout_height="match_parent"
                android:paddingBottom="@dimen/activity_vertical_margin"
                android:paddingLeft="@dimen/activity_horizontal_margin"
                android:paddingRight="@dimen/activity_horizontal_margin"
                android:paddingTop="@dimen/activity_vertical_margin"
                android:orientation="vertical"
                tools:context=".MainActivity" >

                <TextView
                android:layout_width="wrap_content"
                android:layout_height="wrap_content"
                android:layout_gravity="center_horizontal"
                android:autoLink="web"
                android:text="http://android-er.blogspot.com/"
                android:textStyle="bold" />
                <EditText
                android:id="@+id/address"
                android:layout_width="match_parent"
                android:layout_height="wrap_content"
                android:hint="dstAddress" />
                <EditText
                android:id="@+id/port"
                android:layout_width="match_parent"
                android:layout_height="wrap_content"
                android:hint="dstPort" />
                <Button
                android:id="@+id/connect"
                android:layout_width="match_parent"
                android:layout_height="wrap_content"
                android:text="Connect..."/>
                <Button
                android:id="@+id/clear"
                android:layout_width="match_parent"
                android:layout_height="wrap_content"
                android:text="Clear"/>
                <TextView
                android:id="@+id/response"
                android:layout_width="wrap_content"
                android:layout_height="wrap_content"/>

                </LinearLayout>


                AndroidManifest.xml have to be modified to add <uses-permission android:name="android.permission.INTERNET"/>


                download filesDownload the files.

                or Download and install the APK file.


                Cross-post with Hello Raspberry Pi

                Implement Socket on Android to communicate with Raspberry Pi

                Sabtu, 21 Desember 2013

                Google have made some big changes recently to the SDK for Android; it's now included as part of Google Play services 4.0.

                If you're an Android developer you'll be familiar with Google Play services, a unified platform which makes it easy to integrate Google features into your Android apps, delivered through the Play Store and updated at regular intervals. Now that AdMob is part of the package, a key benefit is that changes to the Google Mobile Ads SDK for Android get pushed seamlessly to users through Google Play services. For most SDK updates you don’t need to update your apps each time it changes, saving you development time. Follow these instructions to install the SDK. 

                Install the new Google Mobile Ads SDK for Android

                Jumat, 20 Desember 2013

                Samsung has officially released the Android 4.1.2 Jelly Bean update with base firmware XXLQL for the Galaxy S Advance bearing model number GT-I9070.

                Firmware details
                PDA: I9070XXLQL
                CSC: I9070ITVLQ5
                MODEM: I9070ITVLQ5
                Version: Android 4.1.2
                Build date: Dec 05, 2013
                Regions: Italy

                The new official firmware is currently available as an Over-The-Air (OTA) update as well as through Samsung KIES. However, those who missed the OTA update notification or unable to access the update over Samsung KIES can download and install the same manually, using our step-by-step guide.

                Pre-requisites
                1. Install USB Drivers for Samsung Galaxy S Advance on the computer.
                2. Enable USB Debugging Mode on the phone by navigating to Settings >> Developer Options.
                3. Make a backup of all your important data before following the guide.
                4. The Galaxy S Advance should be factory unlocked and not locked to any particular carrier.
                5. Ensure the battery of the phone is charged more than 80 percent.
                6. The Android 4.1.2 XXLQL Jelly Bean firmware is compatible only with the Samsung Galaxy S Advance (GT-I9070). Applying this to any incorrect variant might brick the device. Verify the model number of the Galaxy S Advance by navigating to Settings >> About Phone.

                Files Required
                1. Android 4.1.2 XXLQL Jelly Bean Firmware (Mirror Link) for Galaxy S Advance I9070
                2. Odin 3.07

                Steps to Update Galaxy S Advance I9070 with Android 4.1.2 XXLQL Jelly Bean Firmware
                Step 1: Extract Firmware zip file using winrar/7zip/winzip or any other extracting tool, you will get a .tar.md5 file and some other files.
                Step 2: Extract Odin zip file and you will get Odin3 v3.07.exe along with few other files.
                Step 3: Switch off the Galaxy S Advance.
                Step 4: Boot the device into Download Mode by pressing and holding Volume Down, Home and Power buttons together until a construction Android robot icon with a warning triangle appears on screen. Now press the Volume Up button to enter Download Mode.
                Step 5: Run Odin on the computer as an Administrator.
                Step 6: Connect the Galaxy S Advance to the computer using USB cable while it is in the Download Mode. Wait until Odin detects the device. When the device is connected successfully, the ID: COM box will turn to light blue with the COM port number. Additionally, the successful connected will be indicated by a message saying Added.

                Note: If the Added message does not appear, then try re-install USB drivers or changing the port on the computer.

                Step 7: Select the following files in Odin from extracted I9070XXLQL firmware folder:
                • Click the PDA button and select the .tar.md5 file.
                • Click the Phone button and select file with MODEM in its name. Ignore if there is no such file.
                • Click the CSC button and select file with CSC in its name. Ignore if there is no such file.
                • Click the PIT button and select the .pit file. Ignore if there is no such file.
                  Step 8: In Odin, enable Auto Reboot and F. Reset Time checkboxes. Also, ensure the Re-Partition checkbox is chosen only if a .pit file was chosen in the previous step.
                  Step 9: Verify everything suggested in Step 7 and Step 8 is done correctly. Then hit the Start button to begin the installation process.
                  Step 10: Once the installation process is completed, your phone will restart and soon you will see a PASS message with green background in the left-most box at the very top of the Odin. You can now unplug the USB cable to disconnect your device from the computer.

                  Samsung Galaxy S Advance I9070 should be now updated with official Android 4.1.2 XXLQL Jelly Bean. Head over to Settings >> About Phone to verify the software version running on the device.

                  Note: If Galaxy S Advance I9070 stuck at booting animation after Step 10 then go to recovery mode (press and hold the Volume Up, Home and Power buttons together) and perform Wipe data/Factory Reset and Wipe Cache Partition task before selecting reboot system now function. In recovery mode use Volume keys to navigate between options and Power key to select the option. Please note, performing wiping task will erase your device internal memory data and not external SD card data.

                  Click here to know How to Root Galaxy S Advance I9070 running on Android 4.1.2 Jelly Bean firmware.

                  How to Update Galaxy S Advance I9070 with Android 4.1.2 XXLQL Jelly Bean Official Firmware

                  Last exercise "ActionBarCompat with ShareActionProvider" setup share content in onCreateOptionsMenu(). The share data will not be updated after then. In this exercise, ShareIntent will be updated when user update content.

                  In my experiment, onOptionsItemSelected() will not be called when Share menu item clicked. So a TextWatcher is implemented when any EditText changed, to update ShareIntent.

                  ActionBarCompat with ShareActionProvider to update dynamic content
                  ActionBarCompat with ShareActionProvider to update dynamic content
                  Modify layout to add EditTexts for user to enter email address, title and content.
                  <LinearLayout xmlns:android="http://schemas.android.com/apk/res/android"
                  xmlns:tools="http://schemas.android.com/tools"
                  android:layout_width="match_parent"
                  android:layout_height="match_parent"
                  android:paddingBottom="@dimen/activity_vertical_margin"
                  android:paddingLeft="@dimen/activity_horizontal_margin"
                  android:paddingRight="@dimen/activity_horizontal_margin"
                  android:paddingTop="@dimen/activity_vertical_margin"
                  android:orientation="vertical"
                  tools:context=".MainActivity" >

                  <TextView
                  android:layout_width="wrap_content"
                  android:layout_height="wrap_content"
                  android:layout_gravity="center_horizontal"
                  android:autoLink="web"
                  android:text="http://android-er.blogspot.com/"
                  android:textStyle="bold" />

                  <EditText
                  android:id="@+id/fieldemailaddress"
                  android:layout_width="match_parent"
                  android:layout_height="wrap_content"
                  android:inputType="textEmailAddress"
                  android:hint="email address" />
                  <EditText
                  android:id="@+id/fieldemailtitle"
                  android:layout_width="match_parent"
                  android:layout_height="wrap_content"
                  android:text="Hello from android-er.blogspot.com"
                  android:hint="email title"/>
                  <EditText
                  android:id="@+id/fieldemailcontent"
                  android:layout_width="match_parent"
                  android:layout_height="wrap_content"
                  android:hint="email content"/>

                  </LinearLayout>

                  /res/menu/main.xml, same as before.
                  <menu 
                  xmlns:myapp="http://schemas.android.com/apk/res-auto"
                  xmlns:android="http://schemas.android.com/apk/res/android" >

                  <item
                  android:id="@+id/action_share"
                  android:title="Share"
                  myapp:actionProviderClass="android.support.v7.widget.ShareActionProvider"
                  myapp:showAsAction="always|withText" />
                  <item
                  android:id="@+id/action_settings"
                  myapp:showAsAction="always|withText"
                  android:title="@string/action_settings"/>

                  </menu>

                  MainActivity.java
                  package com.example.testactionbarcompat;

                  import android.content.Intent;
                  import android.os.Bundle;
                  import android.support.v4.view.MenuItemCompat;
                  import android.support.v7.app.ActionBarActivity;
                  import android.support.v7.widget.ShareActionProvider;
                  import android.text.Editable;
                  import android.text.TextWatcher;
                  import android.view.Menu;
                  import android.view.MenuItem;
                  import android.widget.EditText;
                  import android.widget.Toast;

                  public class MainActivity extends ActionBarActivity {

                  EditText fieldEmailAddress, fieldEmailTitle, fieldEmailContent;

                  private ShareActionProvider myShareActionProvider;

                  @Override
                  protected void onCreate(Bundle savedInstanceState) {
                  super.onCreate(savedInstanceState);

                  setContentView(R.layout.activity_main);
                  fieldEmailAddress = (EditText)findViewById(R.id.fieldemailaddress);
                  fieldEmailTitle = (EditText)findViewById(R.id.fieldemailtitle);
                  fieldEmailContent = (EditText)findViewById(R.id.fieldemailcontent);

                  fieldEmailAddress.addTextChangedListener(myTextWatcher);
                  fieldEmailTitle.addTextChangedListener(myTextWatcher);
                  fieldEmailContent.addTextChangedListener(myTextWatcher);
                  }

                  /*
                  * update ActionProvider by calling setShareIntent()
                  * When any EditText changed
                  */
                  TextWatcher myTextWatcher = new TextWatcher(){

                  @Override
                  public void afterTextChanged(Editable s) {
                  setShareIntent();
                  }

                  @Override
                  public void beforeTextChanged(CharSequence s, int start,
                  int count, int after) {}

                  @Override
                  public void onTextChanged(CharSequence s, int start,
                  int before, int count) {}
                  };

                  @Override
                  public boolean onCreateOptionsMenu(Menu menu) {
                  // Inflate the menu; this adds items to the action bar if it is present.
                  getMenuInflater().inflate(R.menu.main, menu);

                  //add MenuItem(s) to ActionBar using Java code
                  MenuItem menuItem_Info = menu.add(0, R.id.menuid_info, 0, "Info");
                  menuItem_Info.setIcon(android.R.drawable.ic_menu_info_details);
                  MenuItemCompat.setShowAsAction(menuItem_Info,
                  MenuItem.SHOW_AS_ACTION_ALWAYS|MenuItem.SHOW_AS_ACTION_WITH_TEXT);

                  //Handle share menu item
                  MenuItem shareItem = menu.findItem(R.id.action_share);
                  myShareActionProvider = (ShareActionProvider)
                  MenuItemCompat.getActionProvider(shareItem);
                  setShareIntent();

                  //return true;
                  return super.onCreateOptionsMenu(menu);
                  }

                  @Override
                  public boolean onOptionsItemSelected(MenuItem item) {
                  // TODO Auto-generated method stub
                  //return super.onOptionsItemSelected(item);
                  switch (item.getItemId()) {
                  case R.id.action_share:
                  //It never called in my experiment
                  Toast.makeText(this, "Share", Toast.LENGTH_SHORT).show();
                  setShareIntent();
                  return false;
                  case R.id.action_settings:
                  //match with /res/menu/main.xml
                  Toast.makeText(this, "Setting", Toast.LENGTH_SHORT).show();
                  return true;
                  case R.id.menuid_info:
                  //match with defined in onCreateOptionsMenu()
                  Toast.makeText(this, "Info", Toast.LENGTH_SHORT).show();
                  return true;
                  default:
                  return super.onOptionsItemSelected(item);
                  }
                  }

                  //Set the share intent
                  private void setShareIntent(){

                  Intent intent = new Intent(Intent.ACTION_SEND);
                  intent.setType("plain/text");
                  intent.putExtra(Intent.EXTRA_EMAIL,
                  new String[]{fieldEmailAddress.getText().toString()});
                  intent.putExtra(Intent.EXTRA_SUBJECT,
                  fieldEmailTitle.getText().toString());
                  intent.putExtra(Intent.EXTRA_TEXT,
                  fieldEmailContent.getText().toString());

                  myShareActionProvider.setShareIntent(intent);
                  }

                  }


                  download filesDownload the files.


                  Visit: ActionBarCompat Step-by-step

                  ActionBarCompat with ShareActionProvider to update dynamic content